Triggers
Learn how to use triggers that allow you to send notifications based on set conditions.
Triggers react to certain conditions inside your Arduino Cloud Thing, such as a boolean being true, or a string being assigned a value. As soon as a set condition is met a notification gets triggered and sent to you. This is useful when you monitor data and you need to know about any change as soon as it happens. This could be anything from different values in environmental monitoring or security-related information such as movement detection.
Triggers can be set up for any of your existing projects, and are found in the cloud home section.
Hardware & Software Needed
- Arduino Cloud (Maker plan).
- Cloud-compatible boards, see full list.
In this tutorial, we use the Nano 33 IoT. This is not a requirement, you can use any Arduino Cloud-compatible board for this tutorial.
Setup & Configuration
Limitations
Currently, the only variables supported by the trigger feature are:
- Booleans
- Strings
Setup & Configuration
If you are unfamiliar with how to set up a Thing and variables, head on over to the Getting Started with the Arduino Cloud article.
1. Head over to the Things tab and create a new Thing, create a variable, and set up your device including a working network connection.
2. Upload your code to the board you want to use. For demonstration purposes, we'll use a simple button sketch setting our button boolean to true each time a button connected to Pin D3 is pressed. You can of course set this up in whatever way you'd like.
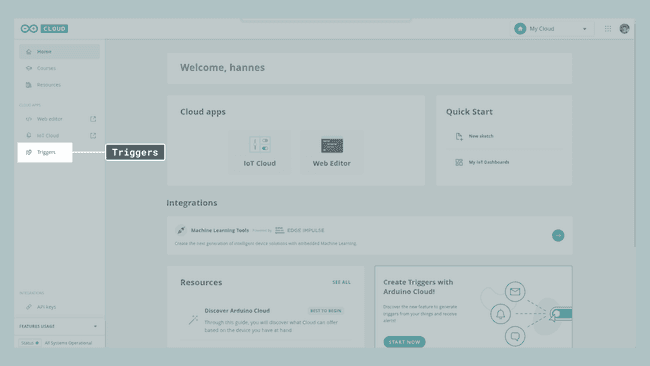
3. Go to Arduino Cloud home and click on Triggers.
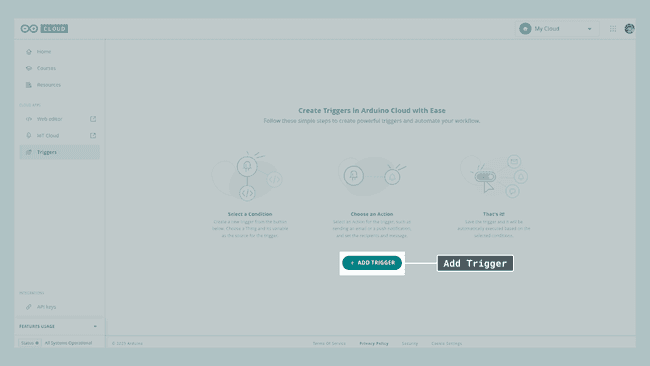
4. Click Add Trigger
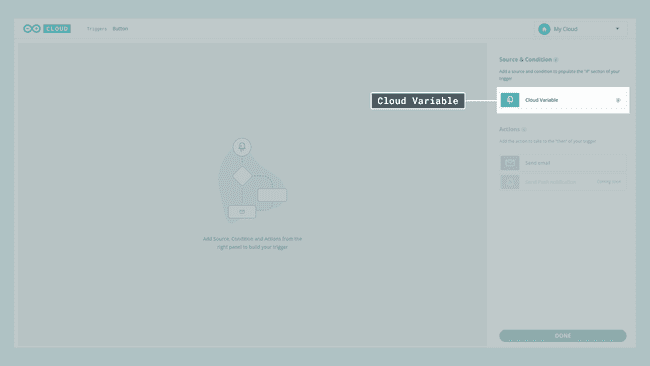
5. Click Cloud Variable
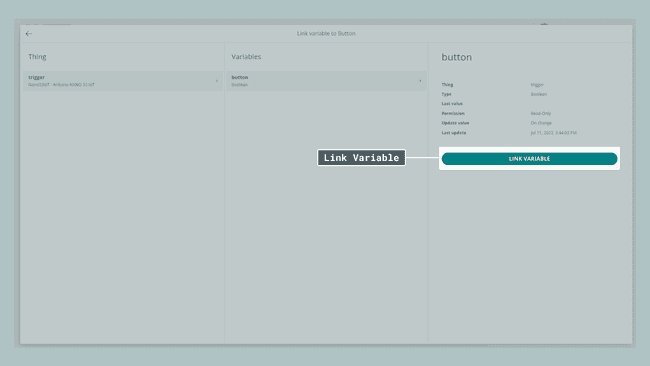
then select your Thing, your Variable, and finally press on Link Variable.
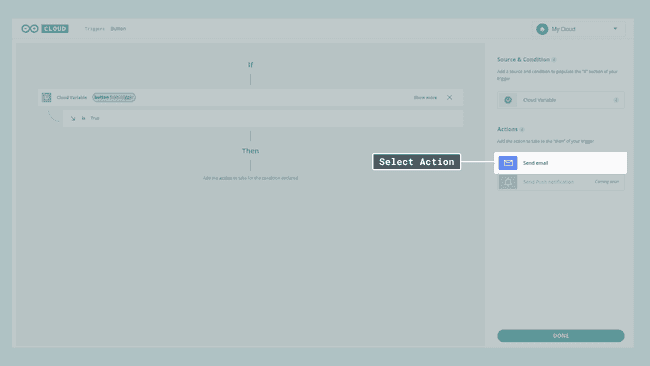
6. Next, select your Action, in our case Email. A new window will pop up in which we can create our personalized message, which is sent each time the trigger is activated.
You can even include dynamic data such as
{variable.timestamp}{variable.value}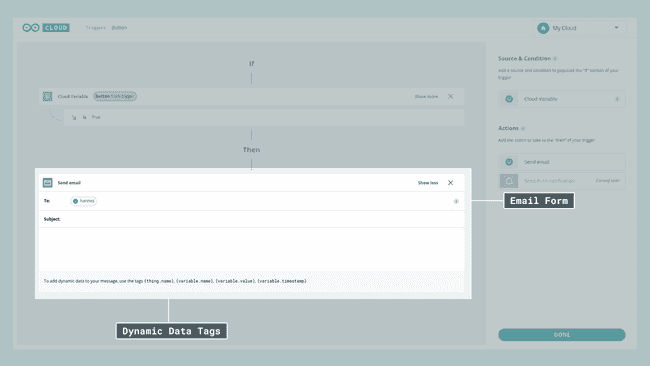
7. Once you're finished press Done. The final step is to turn on the State switch and now your trigger is ready to be used.
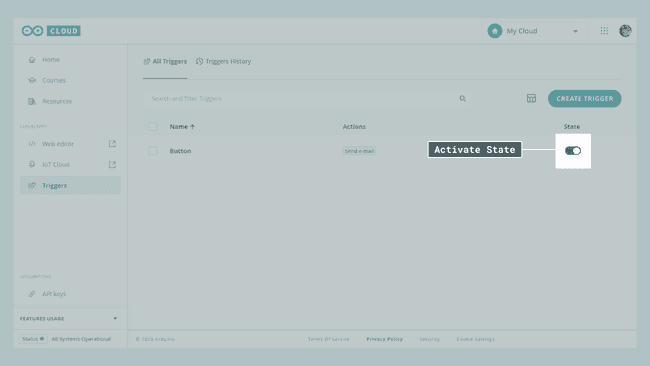
8. Try it out! Press the button and within a couple of seconds, you should receive an email telling you that the trigger has been activated showing you the message that you created in the previous step.
Example Code
1#include "thingProperties.h"2
3const int btnPin = 3;4
5int buttonState = 0;6
7void setup() {8 // Initialize serial and wait for port to open:9 Serial.begin(9600);10 // This delay gives the chance to wait for a Serial Monitor without blocking if none is found11 delay(1500); 12
13 // Defined in thingProperties.h14 initProperties();15
16 // Connect to Arduino Cloud17 ArduinoCloud.begin(ArduinoIoTPreferredConnection);18 19 /*20 The following function allows you to obtain more information21 related to the state of network and Arduino Cloud connection and errors22 the higher number the more granular information you’ll get.23 The default is 0 (only errors).24 Maximum is 425 */26 setDebugMessageLevel(2);27 ArduinoCloud.printDebugInfo();28 29 pinMode(btnPin, INPUT);30 pinMode(LED_BUILTIN, OUTPUT);31}32
33void loop() {34 ArduinoCloud.update();35 36 buttonState = digitalRead(btnPin);37 38 if (buttonState == HIGH) {39 digitalWrite(LED_BUILTIN, LOW);40 button = true;41 } else {42 digitalWrite(LED_BUILTIN, HIGH);43 button = false;44 }45}Use Cases
Here are some suggestions for potential projects that utilize Triggers in a project:
- A motion-detecting PIR, sending a notification as soon as the sensor is triggered.
- An automated plant monitoring setup sending a notification as soon as your plants need water.
- An environmental data collection setup notifying you as soon as the values reach a certain threshold.
Summary
Triggers are a simple but extremely powerful feature allowing you to stay on track with all your Arduino Cloud projects. Instead of constantly checking your dashboards to see the newest update just create a trigger notifying you as soon as changes occur. In this tutorial, we used just one trigger in combination with a simple demo sketch but you can create as many Triggers as you need to automate your projects.
Suggest changes
The content on docs.arduino.cc is facilitated through a public GitHub repository. If you see anything wrong, you can edit this page here.
License
The Arduino documentation is licensed under the Creative Commons Attribution-Share Alike 4.0 license.