Creating an RTC Alarm with MKR Zero
Learn how to build an alarm that triggers at a specific time.
Simple RTC Alarm
In this tutorial, we will use the RTC library methods in order to trigger an action when an alarm is matching the set time. Particularly, in this example, the RTC time will be set at 16:00:00 and an alarm at 16:00:10. When the time match is reached, using the match type
MATCH_HHMMSS- Arduino IDE (online or offline).
- Arduino MKR Zero (link to store).
Circuit
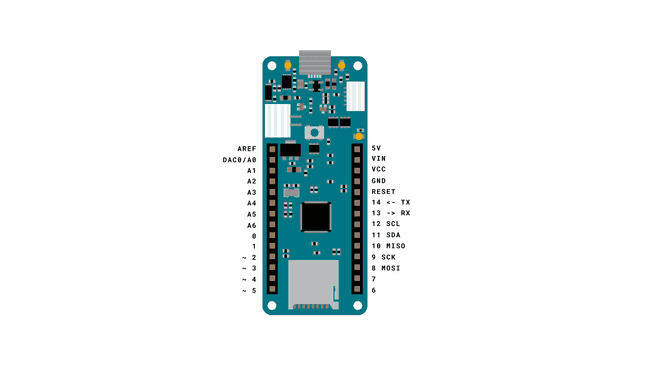
This tutorial requires only a MKR Zero board.

Programming the Board
We will now get to the programming part of this tutorial.
1. First, let's make sure we have the drivers installed. If we are using the Web Editor, we do not need to install anything. If we are using an offline editor, we need to install it manually. This can be done by navigating to Tools > Board > Board Manager.... Here we need to look for the Arduino SAMD boards (32-bits Arm® Cortex®-M0+) and install it.
2. Now, we need to install the libraries needed. If we are using the Web Editor, there is no need to install anything. If we are using an offline editor, simply go to Tools > Manage libraries.., and search for RTCZero and install it.
3. Here are some of the core functions of this sketch:
- create an RTC object.RTCZero rtc
- prevents programming from running until we open the Serial Monitor.while(!Serial)
- initializes the library.rtc.begin()
- sets a starting time. "Property" is replaced by a time format, e.g. minute, year.rtc.setProperty();
- retrieves the actual time. "Property" is replaced by a time format, e.g. minute, year.rtc.getProperty()
- sets an alarm at specific time.rtc.setAlarmTime(hour, minute, second)
- enables the alarm if time is matched.rtc.enableAlarm(rtc.MATCH_HHMMSS)
- custom function that adds a "0" before a digit. E.g. 0:0:0 becomes 00:00:00, for better readability.void print2digits(int number)
The sketch can be found in the snippet below. Upload the sketch to your MKR Zero board.
1#include <RTCZero.h>2
3/* Create an rtc object */4
5RTCZero rtc;6
7/* Change these values to set the current initial time */8
9const byte seconds = 0;10
11const byte minutes = 0;12
13const byte hours = 16;14
15/* Change these values to set the current initial date */16
17const byte day = 25;18
19const byte month = 9;20
21const byte year = 15;22
23void setup()24{25
26 Serial.begin(9600);27
28 while(!Serial);29 rtc.begin(); // initialize RTC 24H format30
31 rtc.setTime(hours, minutes, seconds);32
33 rtc.setDate(day, month, year);34
35 rtc.setAlarmTime(16, 0, 10);36
37 rtc.enableAlarm(rtc.MATCH_HHMMSS);38
39 rtc.attachInterrupt(alarmMatch);40}41
42void loop()43{44
45}46
47void alarmMatch()48{49 50 Serial.println("Alarm Matched at: ");51 print2digits(rtc.getHours()); //retrieve hours52 Serial.print(":");53 print2digits(rtc.getMinutes()); //retrieve minutes54 Serial.print(":");55 print2digits(rtc.getSeconds()); //retrieve seconds56 57}58
59void print2digits(int number) {60 if (number < 10) {61 Serial.print("0"); // print a 0 before if the number is < than 1062 }63 Serial.print(number);64}Testing It Out
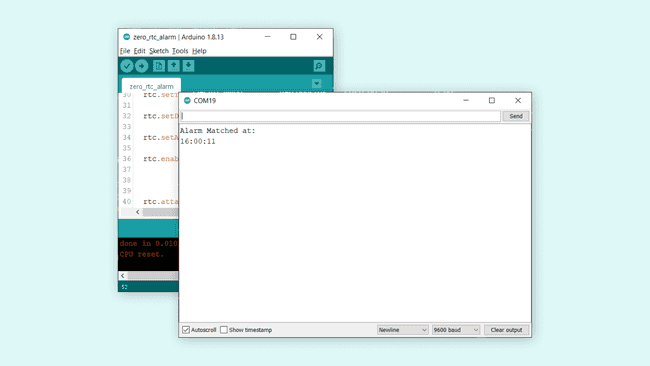
After we have successfully uploaded the code to the board, open the Serial Monitor. After 10 seconds, it should print the following:
1Alarm matched at:216:00:11Now, as you can see, the time printed is
16:00:1116:00:10print2digits()
And that is basically how we create an alarm function, using only our MKR Zero board!
Troubleshoot
If the code is not working, there are some common issues we can troubleshoot:
- Check that the
library is installed.RTCZero - Make sure there are no missing curly brackets {}.
- We have not selected the right port and board.
Conclusion
This tutorial covers some basics on RTC and how to print the time and date continuously on an OLED display. But this technology is heavily used in modern designs, and knowing just the basics of it can be very beneficial.
Suggest changes
The content on docs.arduino.cc is facilitated through a public GitHub repository. If you see anything wrong, you can edit this page here.
License
The Arduino documentation is licensed under the Creative Commons Attribution-Share Alike 4.0 license.