RobotInputs
Learn how to control the knob and the keyboard.
Inputs
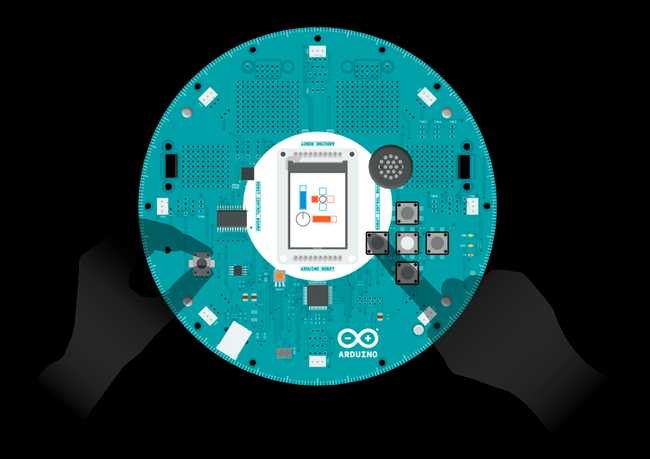
This sketch shows you how to use the control board potentiometer and buttons as a keyboard. It turns the robot into a mobile music machine, have some fun with the music by pressing different buttons.
Hardware Required
- Arduino Robot
Instruction
Upload the example, you can keep USB plugged in once finished.
After the starting screen, you will hear the music playing.
On the screen, the vertical blue bar indicates the tempo of the music. The horizontal bar in orange shows the pitch. The cross shape in the middle represents the buttons, and the circle on the bottom left corresponds to the knob.
Press different buttons, or try rotating the knob. You should see the interface on the screen change.
Try it out

Code
1/* Robot Inputs2
3 This sketch shows you how to use the on-board4
5 potentiometer and buttons as inputs.6
7 Turning the potentiometer draws a clock-shaped8
9 circle. The up and down buttons change the pitch,10
11 while the left and right buttons change the tempo.12
13 The middle button resets tempo and pitch.14
15 Circuit:16
17 * Arduino Robot18
19 created 1 May 201320
21 by X. Yang22
23 modified 12 May 201324
25 by D. Cuartielles26
27 This example is in the public domain28
29 */30
31#include <ArduinoRobot.h>32#include <Wire.h>33
34// default tempo and pitch of the music35int tempo = 60;36int pitch = 1000;37
38void setup() {39
40 // initialize the Robot, SD card, speaker, and display41
42 Robot.begin();43
44 Robot.beginTFT();45
46 Robot.beginSpeaker();47
48 Robot.beginSD();49
50 // draw "lg0.bmp" and "lg1.bmp" on the screen51
52 Robot.displayLogos();53
54 // play a sound file55
56 Robot.playFile("Melody.sqm");57}58
59void loop() {60
61 // check the value of the buttons62
63 keyDown(Robot.keyboardRead());64
65 // check the value of the pot66
67 drawKnob(Robot.knobRead());68}69
70// Draw the basic interface71void renderUI() {72
73 //fill the buttons blank74
75 Robot.fill(255, 255, 255);76
77 Robot.rect(53, 58, 13, 13); // left78
79 Robot.rect(93, 58, 13, 13); // right80
81 Robot.rect(73, 38, 13, 13); // up82
83 Robot.circle(79, 64, 6); // middle84
85 Robot.rect(73, 78, 13, 13); // down86
87 //draw the knob88
89 Robot.noFill();90
91 Robot.circle(26, 116, 17); // knob92
93 //draw the vertical bargraph94
95 int fullPart = map(pitch, 200, 2000, 0, 58); //length of filled bargraph96
97 Robot.fill(255, 255, 255);98
99 Robot.rect(21, 30, 13, 58 - fullPart);100
101 Robot.fill(0, 0, 255);102
103 Robot.rect(21, 88 - fullPart, 13, fullPart); //58-fullPart+30104
105 //draw the horizontal bargraph106
107 fullPart = map(tempo, 20, 100, 0, 58); // length of filled bargraph108
109 Robot.fill(255, 190, 0);110
111 Robot.rect(53, 110, fullPart, 13);112
113 Robot.fill(255, 255, 255);114
115 Robot.rect(53 + fullPart, 110, 58 - fullPart, 13);116}117
118void keyDown(int keyCode) {119
120 // use a static int so it is persistent over time121
122 static int oldKey;123
124 switch (keyCode) {125
126 case BUTTON_LEFT:127
128 //left button pressed, reduces tempo129
130 tempo -= 5;131
132 if (tempo < 20) {133
134 tempo = 20; //lowest tempo 20135
136 }137
138 Robot.fill(255, 190, 0);139
140 Robot.rect(53, 58, 13, 13);141
142 break;143
144 case BUTTON_RIGHT:145
146 //right button pressed, increases tempo147
148 tempo += 5;149
150 if (tempo > 100) {151
152 tempo = 100; //highest tempo 100153
154 }155
156 Robot.fill(255, 190, 0);157
158 Robot.rect(93, 58, 13, 13);159
160 break;161
162 case BUTTON_UP:163
164 //up button pressed, increases pitch165
166 pitch += 120;167
168 if (pitch > 2000) {169
170 pitch = 2000;171
172 }173
174 Robot.fill(0, 0, 255);175
176 Robot.rect(73, 38, 13, 13);177
178 break;179
180 case BUTTON_DOWN:181
182 //down button pressed, reduces pitch183
184 pitch -= 120;185
186 if (pitch < 200) {187
188 pitch = 200;189
190 }191
192 Robot.fill(0, 0, 255);193
194 Robot.rect(73, 78, 13, 13);195
196 break;197
198 case BUTTON_MIDDLE:199
200 //middle button pressed, resets tempo and pitch201
202 tempo = 60;203
204 pitch = 1000;205
206 Robot.fill(160, 160, 160);207
208 Robot.circle(79, 64, 6);209
210 break;211
212 case BUTTON_NONE:213
214 //Only when the keys are released(thus BUTTON_NONE is215
216 //encountered the first time), the interface will be217
218 //re-drawn.219
220 if (oldKey != BUTTON_NONE) {221
222 renderUI();223
224 }225
226 break;227
228 }229
230 if (oldKey != keyCode) {231
232 // change the song's tempo233
234 Robot.tempoWrite(tempo);235
236 // change the song's pitch237
238 Robot.tuneWrite(float(pitch / 1000.0));239
240 }241
242 oldKey = keyCode;243}244
245//Draw a circle according to value246//of the knob.247void drawKnob(int val) {248
249 static int val_old;250
251 int r = map(val, 0, 1023, 1, 15);252
253 //Only updates when the254
255 //value changes.256
257 if (val_old != r) {258
259 Robot.noFill();260
261 //erase the old circle262
263 Robot.stroke(255, 255, 255);264
265 Robot.circle(26, 116, r + 1);266
267 //draw the new circle268
269 Robot.stroke(255, 0, 255);270
271 Robot.circle(26, 116, r);272
273 Robot.stroke(0, 0, 0);274
275 val_old = r;276
277 }278}Suggest changes
The content on docs.arduino.cc is facilitated through a public GitHub repository. If you see anything wrong, you can edit this page here.
License
The Arduino documentation is licensed under the Creative Commons Attribution-Share Alike 4.0 license.