TFTDisplayText
Read the value of a sensor and print it on the screen.
TFT Display Text
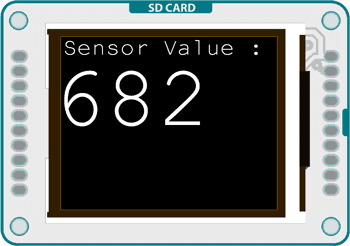
This example demonstrates how to draw text on the Arduino GLCD screen when connected to an Arduino. The Arduino reads the value of an analog sensor attached to pin A0, and writes the value to the LCD screen, updating every quarter second.
Hardware Required
Arduino Uno
Arduino TFT screen
breadboard
hookup wire
one 10-kilohm potentiometer
Circuit
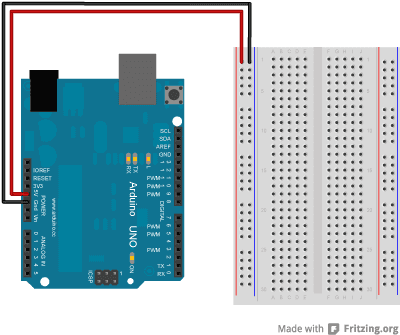
Connect power and ground to the breadboard.
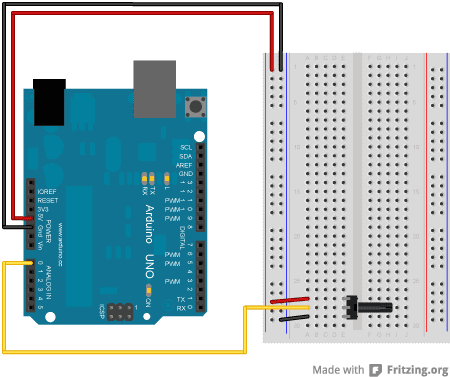
Place the potentiometer on the breadboard. Connect one side to ground, and the other to power. Connect the middle pin to A0.
Connect the screen to the breadboard. The headers on the side of the screen with the small blue tab and arrow should be the ones that attach to the board. Pay attention to the orientation of the screen, in these images, it is upside down.
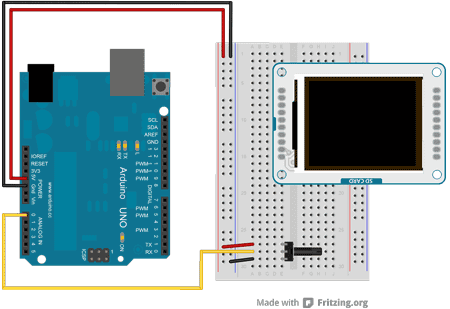
Connect the BL and +5V pins to power, and GND to ground. Connect CS-LD to pin 10, DC to pin 9, RESET to pin 8, MOSI to pin 11, and SCK to pin 13. If you're using a Leonardo, you'll be using different pins. see the getting started page for more details.
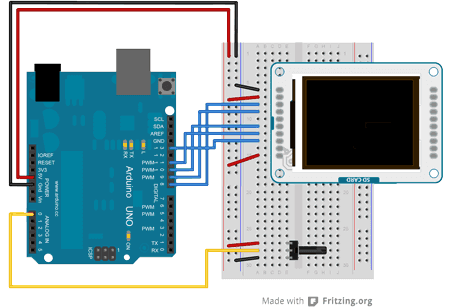 Click the image for a larger version
Code
To use the screen you must first include the SPI and TFT libraries.
1#include <SPI.h>2#include <TFT.h>Define the pins you're going to use for controlling the screen, and create an instance of the TFT library named
TFTscreen1#define cs 102#define dc 93#define rst 84
5TFT TFTscreen = TFT(cs, dc, rst);To update the screen with text, you'll need to store dynamic content in a char array.
char sensorPrintout[4];In
setup()stroke()loop()1void setup() {2
3 TFTscreen.begin();4
5 TFTscreen.background(0, 0, 0);6
7 TFTscreen.stroke(255,255,255);8
9 TFTscreen.setTextSize(2);10
11 TFTscreen.text("Sensor Value : ",0,0);12
13 TFTscreen.setTextSize(5);14}In
loop()1void loop() {2
3 String sensorVal = String(analogRead(A0));4
5 sensorVal.toCharArray(sensorPrintout, 4);Set the text color (this would be a good place to change the color of the text depending on the value from the potentiometer), and print it to the screen below the static text.
1TFTscreen.stroke(255,255,255);2
3 TFTscreen.text(sensorPrintout, 0, 20);Wait a quarter of a second, then erase the text you just wrote, so you can update it in the next run through
loop()1delay(250);2
3 TFTscreen.stroke(0,0,0);4
5 TFTscreen.text(sensorPrintout, 0, 20);6}The complete sketch is below :
Suggest changes
The content on docs.arduino.cc is facilitated through a public GitHub repository. If you see anything wrong, you can edit this page here.
License
The Arduino documentation is licensed under the Creative Commons Attribution-Share Alike 4.0 license.